

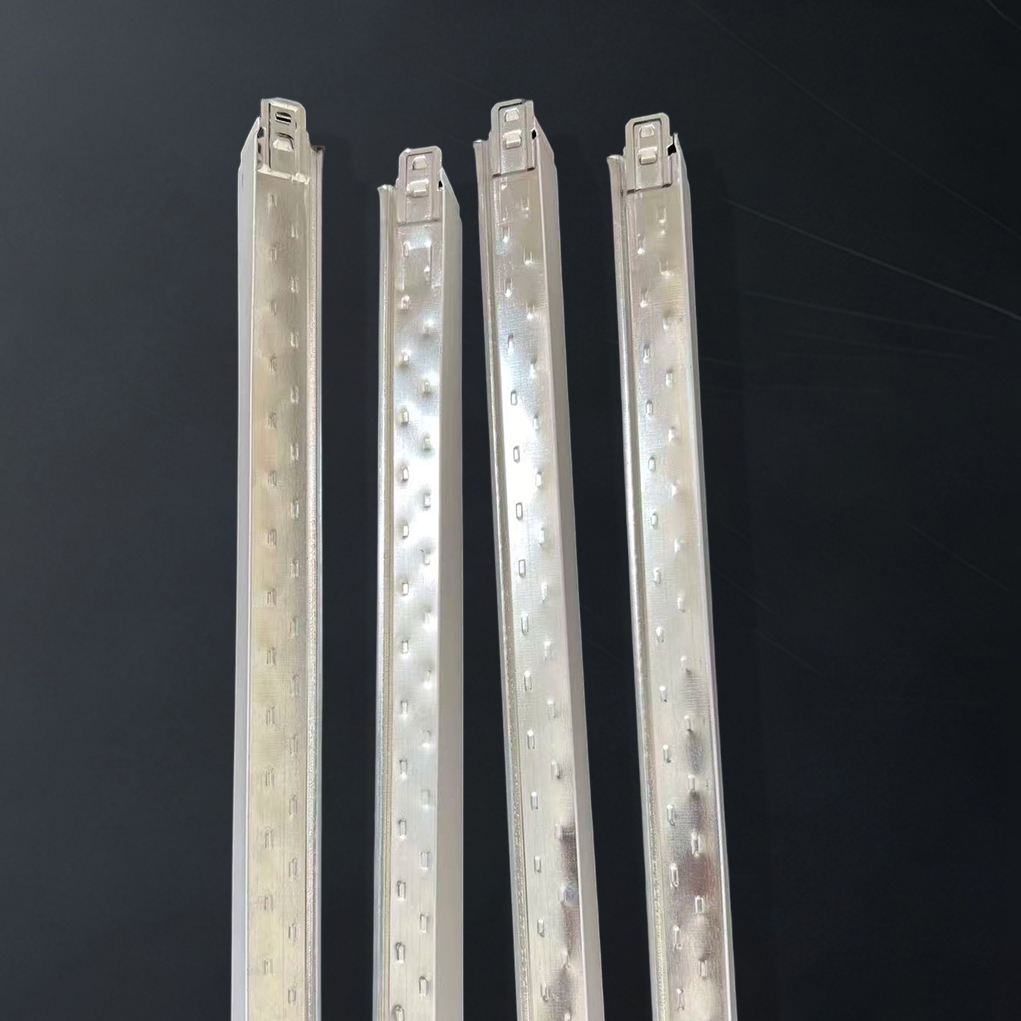
Installing a Suspended Ceiling T Bar system correctly is one of the most important steps in creating a stable, level, and professional-looking ceiling grid. Whether the project is for an office, retail space, school, clinic, basement, or commercial interior, the quality of the ceiling grid installation directly affects the final appearance, structural consistency, and long-term performance of the ceiling. A properly installed T bar ceiling frame supports acoustic tiles, mineral fiber panels, lightweight access panels, and other Suspended Ceiling Materials with reliable alignment and clean visual finish.
In this guide, you will find clear, industry-general information on how to install Suspended Ceiling T Bar correctly, including system definition, component descriptions, advantages, typical specifications, installation steps, common mistakes, and maintenance tips. The content is written in SEO-friendly English and structured for direct use in blog posts, category pages, service pages, or industry resource pages.
A suspended ceiling T bar system is a metal framework designed to hang below the structural ceiling using wires or hangers. It is commonly called a drop ceiling, grid ceiling, or Ceiling Suspension System. The system uses Main Runners, Cross Tees, Wall Angles, hanger wires, and perimeter trim to create a stable grid that supports ceiling tiles.
The term T bar comes from the cross-sectional shape of the grid components, which resemble the letter “T.” These parts interlock to form square or rectangular openings, usually sized to match standard ceiling panels. The system is widely used because it offers easy installation, access to overhead utilities, improved acoustic performance, and a clean finished appearance.
Correct suspended Ceiling T Bar Installation is essential for both safety and visual quality. If the ceiling grid is not level, securely supported, or properly spaced, the ceiling tiles may sag, shift, crack, or fail to sit correctly. Poor installation can also make access to plumbing, electrical systems, HVAC ductwork, and fire protection components more difficult.
A well-installed Ceiling T Grid provides the following benefits:
Before learning how to install suspended ceiling T bar correctly, it is important to understand the basic parts of the system. Each component plays a specific role in the strength, spacing, and finish of the ceiling grid.
| Component | Function | Typical Material |
|---|---|---|
| Main Runner | Primary structural member that carries the grid load and connects to hangers | Galvanized steel or aluminum |
| Cross Tee | Forms the smaller grid sections between main runners | Galvanized steel or aluminum |
| Wall Angle | Perimeter support fixed to the wall to hold tile edges | Metal angle trim |
| Hanger Wire | Suspends the ceiling grid from the structure above | Galvanized steel wire |
| Ceiling Tile / Panel | Fits into the grid openings to create the finished ceiling surface | Mineral fiber, gypsum, metal, PVC, or acoustic panel |
| Hold-Down Clip / Connection Clip | Helps secure components in special conditions or seismic applications | Metal or system-specific hardware |
Suspended Ceiling Grids are popular across many building types because they are practical, cost-effective, and adaptable. The ceiling T bar system can be used in offices, hospitals, educational buildings, restaurants, retail interiors, and homes.
The suspended ceiling T bar system is used in many interior environments. Different project types may require different load capacities, corrosion resistance levels, fire performance ratings, or acoustic properties. However, the installation principles remain generally the same.
| Application Area | Typical Need | Why T Bar Works Well |
|---|---|---|
| Office Buildings | Access to lighting, HVAC, and cabling | Easy removal of tiles and flexible layout |
| Retail Stores | Neat appearance and quick maintenance | Supports decorative and acoustic panels |
| Schools | Durable, practical ceiling access | Simple inspection and panel replacement |
| Hospitals / Clinics | Hygienic and serviceable ceiling systems | Compatible with specialty panels and access points |
| Basements | Hide pipes, wires, and ducts | Allows low-profile and adjustable ceiling solutions |
| Hospitality Areas | Acoustic comfort and visual consistency | Works with decorative and sound-absorbing tiles |
T bar systems come in different sizes and materials depending on the building requirements. The most common ceiling grid specifications are designed for standard panel dimensions and easy modular layout.
| Specification | Common Range | Notes |
|---|---|---|
| Main Runner Length | 3600 mm / 12 ft or similar | Common modular length for suspended ceilings |
| Cross Tee Length | 600 mm, 1200 mm, 2 ft, 4 ft | Matches standard tile layouts |
| Grid Width | 15 mm, 24 mm, or system-specific | Depends on visual style and tile type |
| Material | Galvanized steel, aluminum | Chosen for strength and corrosion resistance |
| Finish | White, black, silver, powder-coated | Selected for design and performance needs |
| Grid Pattern | 600 x 600 mm, 600 x 1200 mm, 2 x 2 ft, 2 x 4 ft | Most common tile formats |
| Support Spacing | Varies by system and load | Must follow local code and manufacturer guidance |
A successful suspended ceiling T bar installation depends on careful preparation. Before starting, gather the correct tools and materials to help ensure accurate layout, proper support, and efficient installation.
| Tools | Purpose |
|---|---|
| Measuring tape | Used to measure room dimensions and grid spacing |
| Laser level or spirit level | Ensures the ceiling grid is level |
| Chalk line | Marks layout lines on walls and structure |
| Wire cutter / snips | Cuts hanger wire and metal trim |
| Drill and anchors | Secures wall angles and hanger points |
| Step ladder / scaffold | Provides safe access during overhead work |
| Square and straightedge | Helps keep lines and cuts accurate |
| Materials | Purpose |
|---|---|
| Main runners | Primary suspension and load-bearing members |
| Cross tees | Form the secondary grid pattern |
| Wall angle | Supports the perimeter edges |
| Hanger wire | Suspends the ceiling grid from above |
| Fasteners | Connects components to walls and structure |
| Ceiling tiles | Fill the grid openings to create the final surface |
The following installation process is a general guide for standard ceiling T bar systems. Always follow local building codes, project specifications, and the manufacturer’s instructions for the specific product being installed.
Start by measuring the full room size, checking ceiling height, and identifying obstacles such as vents, lights, beams, pipes, sprinklers, and access points. This planning stage is critical because the layout determines the visual balance of the ceiling and helps avoid narrow edge tiles.
Measure the room in both directions and determine the centerline or the most suitable starting point. A symmetrical layout is generally preferred because it creates a cleaner appearance and reduces awkward tile cuts at the edges.
Use a laser level or spirit level to mark the perimeter line where the wall angle will be installed. This line establishes the finished height of the suspended ceiling. Accuracy is very important because any mistake here will affect the entire grid.
Make sure to consider the clearance needed above the ceiling for lighting fixtures, ductwork, sprinkler heads, and any other overhead systems. If the ceiling is too low, service access and building performance may be affected.
The wall angle is fixed around the perimeter of the room along the marked level line. It provides edge support for the grid and helps keep the ceiling square and stable. Fasten the wall angle securely to the wall using suitable anchors, screws, or other approved fasteners.
At inside and outside corners, cut the angle neatly so that the perimeter joint is clean and continuous. A properly installed wall angle helps prevent sagging and supports the first row of grid components.
The next step is to mark the points where the ceiling grid will be suspended from the structure above. Hanger wires should be placed at intervals that match the grid requirements and structural conditions. The actual spacing may vary depending on the system design and load requirements.
Ensure that hanger points are aligned in straight rows so the grid stays level and balanced. Poorly positioned hangers can cause visible waves, uneven tile joints, or distortion in the ceiling frame.
Secure hanger wires to the structural ceiling using approved anchors or attachment methods. The wire should be long enough to allow the grid to be positioned at the correct finished height, with enough extra length for adjustment.
The wire should be twisted tightly and safely attached so it does not slip or loosen over time. When properly installed, the hanger wire carries the weight of the Suspended Ceiling System and helps maintain a level ceiling plane.
Hang the main runners from the attached wires and align them according to the planned grid layout. Main runners are the backbone of the Suspended Ceiling System, so they must be straight, level, and properly spaced.
Check each main runner with a level as you proceed. Adjust the height as needed to create a flat plane across the room. The runners should lock or connect according to the system design, ensuring that the joints are secure and aligned.
Insert the cross tees into the main runners to form the full ceiling grid. Cross tees divide the space into standard module sizes, such as 600 x 600 mm or 600 x 1200 mm, depending on the tile format.
As the grid expands, regularly check the squareness of each opening. If the grid is not square, the tiles may not fit correctly, and the finished ceiling may appear uneven.
Once the main runners and cross tees are in place, verify that the entire structure is square, level, and properly supported. Measure diagonally across several grid openings to confirm consistent dimensions.
This is one of the most important parts of how to install suspended ceiling T bar correctly. A grid that is not square will lead to installation problems and poor visual alignment. Make final adjustments before installing the ceiling tiles.
After confirming that the grid is level and square, place the ceiling tiles or panels into the openings. Lower each tile carefully into the grid so it sits flat and supported on all sides.
If lighting fixtures, diffusers, or access panels are used, install them according to the ceiling design and ensure the grid has appropriate support for any concentrated loads. Do not overload a standard T bar grid beyond its rated capacity.
Inspect the entire ceiling for alignment, secure joints, proper tile fit, and even spacing. Look for gaps, bowed sections, loose wires, or any areas that need correction. The goal is a neat and stable suspended ceiling that performs well over time.
Final inspection should also confirm that the ceiling system does not interfere with safety devices, utilities, or access requirements. Any necessary adjustments should be made before the project is completed.
To achieve the best results, installers should follow proven best practices throughout the project. These practices improve ceiling quality, reduce rework, and help the final system perform as intended.
Even a simple suspended ceiling can fail to look professional if installation errors occur. Avoiding common mistakes is just as important as following the correct installation steps.
| Common Mistake | Possible Problem | How to Avoid It |
|---|---|---|
| Uneven wall angle height | Ceiling appears sloped or misaligned | Use a laser level and check perimeter marks carefully |
| Incorrect hanger spacing | Grid sagging or instability | Follow the required spacing for the system |
| Grid not square | Tiles will not fit properly | Measure diagonals and adjust before installing tiles |
| Loose wire attachment | Potential movement or failure over time | Fasten wires securely to approved anchors |
| Overloading the grid | Deflection or component failure | Check load ratings before adding fixtures |
| Poor planning around utilities | Clashes with ductwork, lights, or sprinklers | Plan the ceiling layout before installation begins |
Different projects require different ceiling grid specifications. Choosing the correct suspended ceiling T bar system depends on the environment, tile type, weight requirements, aesthetic goals, and building regulations.
| Selection Factor | What to Consider |
|---|---|
| Room Use | Office, retail, healthcare, residential, or industrial application |
| Tile Size | Standard 600 x 600 mm, 600 x 1200 mm, 2 x 2 ft, or 2 x 4 ft panels |
| Load Requirement | Lightweight panels or heavier accessories such as lights and diffusers |
| Corrosion Resistance | Important for humid or demanding environments |
| Acoustic Performance | Needed where sound control is important |
| Visual Style | Grid width, finish color, and visible profile |
| Code Compliance | Fire, safety, and structural requirements |
After installation, regular maintenance helps keep the ceiling grid in good condition. Although suspended ceilings are generally low maintenance, periodic inspection is recommended to make sure all components remain secure and clean.
Standard spacing depends on the ceiling system and tile size. Common modular layouts include 600 x 600 mm, 600 x 1200 mm, 2 x 2 ft, and 2 x 4 ft. Always follow the specific product layout instructions and local requirements.
Yes, but lighting fixtures must be supported according to the ceiling system design and applicable safety rules. Heavy fixtures usually require independent support, not just the grid itself.
An uneven ceiling is often caused by incorrect wall height marking, inconsistent hanger wire lengths, or poor adjustment of main runners. Rechecking the level during installation usually helps prevent this issue.
Yes. While commonly used in commercial buildings, suspended ceiling T bar systems are also suitable for basements, utility rooms, and modern residential interiors where access and concealment are needed.
Learning how to install suspended ceiling T bar correctly is essential for achieving a clean, durable, and functional ceiling finish. From careful planning and accurate marking to secure hanger installation, level main runners, square cross tees, and proper tile placement, each step contributes to the success of the final system. A well-installed suspended ceiling grid improves appearance, simplifies maintenance, supports acoustic performance, and provides access to building services above the ceiling.
For blog content, directory pages, and industry resource pages, this topic remains highly relevant because suspended ceiling systems continue to be widely used across commercial and residential applications. By focusing on correct methods, system components, key specifications, and common mistakes, this guide offers original, SEO-friendly information that is suitable for direct HTML insertion and optimized for search visibility.
This website uses cookies to ensure you get the best experience on our website.


 Phone:
Comment
(0)