

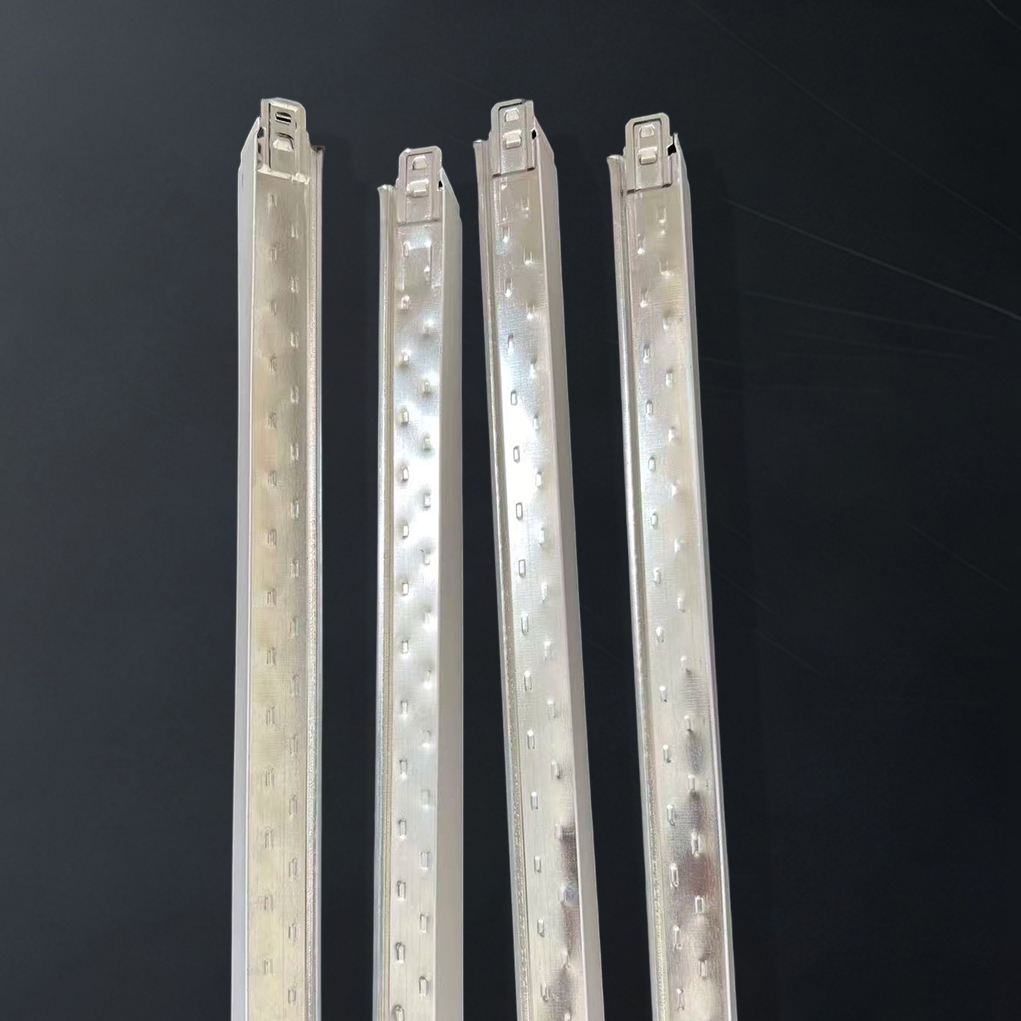
A ceiling grid construction process is the method used to build a Suspended Ceiling Framework that supports ceiling tiles, panels, lighting, HVAC components, access points, and other overhead systems. In commercial and residential interiors, a properly installed Ceiling Grid System improves aesthetics, hides services, supports acoustic performance, and provides a practical way to access utilities above the ceiling line.
This guide explains the ceiling grid construction process step by step in clear, SEO-friendly English. It covers the main components, standard terminology, installation sequence, common specifications, benefits, and practical considerations. The content is written for use on blogs, directory pages, industry pages, and service pages, and it focuses only on general industry information without company recommendations.
A ceiling grid system is a suspended framework made of metal channels and supporting members that creates a stable structure for ceiling tiles or panels. It is commonly used in offices, retail spaces, hospitals, schools, hotels, warehouses, and many other commercial interiors. The grid is typically hung below the structural slab or roof deck using wire hangers, anchors, and perimeter trim.
The system is designed to be modular, which means the ceiling layout can be built in standardized dimensions. This makes the installation process efficient and the finished ceiling easy to maintain. In most projects, the ceiling grid is installed before tiles or panels are placed into the openings.
The ceiling grid construction process is more than just assembling metal parts. It affects the safety, performance, appearance, and maintainability of the entire ceiling assembly. A precise installation helps ensure that the ceiling remains level, stable, and compatible with the surrounding building systems.
Key reasons the ceiling grid process matters include:
Before understanding the installation process, it helps to know the basic parts of a typical Suspended Ceiling Grid. Although product designs can vary by region and application, most systems include the following components:
| Component | Function | Typical Use |
|---|---|---|
| Main Runner | Primary structural member that carries the load | Runs in the main direction of the layout |
| Cross Tee | Connects to main runners and forms tile openings | Creates the grid modules |
| Wall Angle / perimeter trim | Supports the outer edge of the grid at the wall line | Installed around the room perimeter |
| Hanger wire | Suspends the grid from the structural deck | Attached to anchors or approved supports |
| Anchors / fasteners | Secure the suspension system to the structure | Depends on slab, joists, or roof structure |
| Ceiling tiles or panels | Finish the ceiling surface and provide performance benefits | Placed into the grid openings |
Different projects use different ceiling grid configurations depending on the building design and performance requirements. The most common categories include:
The following section explains the ceiling grid construction process step by step. While exact procedures can vary based on local codes, product specifications, and project design, the general workflow is similar across most installations.
The first step in any ceiling grid installation is reviewing the project drawings, layout plans, and technical specifications. This ensures the installation team understands the ceiling height, grid module size, lighting locations, mechanical penetrations, access points, and any required fire or acoustic performance standards.
At this stage, installers should confirm:
Before installation, the structural deck, slab, or overhead framing should be checked for suitability. The structure must be capable of supporting hanger wires or other suspension methods. The installer should identify obstacles such as pipes, ducts, cable trays, and structural irregularities that could affect the ceiling layout.
This inspection is important because the ceiling grid must hang level and remain stable over time. Any defects, moisture issues, or structural conflicts should be resolved before the grid installation begins.
The next step is transferring the finished ceiling level onto the walls using a laser level, chalk line, or other layout tools. The perimeter line determines where the wall angle or trim will be installed. Accurate marking is essential because even a small error at the perimeter can affect the entire ceiling grid alignment.
Installers typically check multiple points around the room to make sure the ceiling line is level and consistent. If the existing structure is uneven, adjustments may be required so the final ceiling appears visually straight.
Once the layout is marked, the perimeter trim or wall angle is fixed around the room edges. This component forms the outer support for the ceiling grid and helps maintain a clean transition between the wall and ceiling.
Wall angle is usually fastened at regular intervals according to the system specification. Corners must be cut and joined neatly, and the trim should follow the established ceiling level. A properly installed perimeter member helps keep the grid aligned and provides a secure resting point for the outer grid edges.
The main runners are the primary structural members of the ceiling grid. They are positioned according to the layout plan, usually running in a consistent direction across the room. The spacing depends on the chosen grid module and system design.
At this stage, installers often snap reference lines to maintain accurate alignment. The main runners are then placed so that the cross tees can connect at regular intervals and form the tile openings. Consistency here is critical because the whole ceiling grid depends on this foundation.
Suspension wires are attached to the structural deck or approved support points. These wires hold the ceiling grid at the correct height. The spacing and placement of hanger wires must follow the applicable system requirements and local code rules.
Typical principles include:
Good suspension wire installation is essential for ceiling stability. Poorly placed or loose hangers can lead to sagging, misalignment, or performance issues later.
After the suspension wires are ready, the main runners are lifted into position and connected to the hangers. The runners must be kept level across the room, since they form the backbone of the system.
Installers usually check alignment repeatedly during this stage. If the main runners are too high, too low, or uneven, the final ceiling surface may look irregular. Precision is especially important in large commercial spaces where long sight lines make any error easier to see.
Cross tees are installed between main runners to form the grid modules. These pieces create the rectangular openings that will later hold the ceiling tiles or panels. The cross tees lock into place and are spaced according to the selected tile size.
This stage turns the suspension framework into a complete ceiling grid. The installer should check that each connection is secure and that the openings are consistent in size. A regular module pattern improves the appearance and makes tile installation easier.
Once the main components are in place, the entire ceiling grid must be checked for squareness and level. This is one of the most important parts of the ceiling grid construction process because even a small deviation can cause visible issues in the finished ceiling.
Installers typically verify:
If necessary, adjustments are made before proceeding. This step helps ensure the grid is ready to carry the ceiling tiles and accessories without distortion.
Many ceilings include lighting fixtures, air diffusers, speakers, access panels, sprinklers, or other building services. These items often require extra support independent of the grid itself. The goal is to prevent overload and maintain the integrity of the ceiling system.
Additional supports may include:
This step is especially important in commercial ceiling grid construction because the ceiling often interacts with multiple MEP systems. Coordination between trades helps avoid rework and improves overall installation quality.
After the grid is complete and checked, the ceiling tiles or panels can be placed into the openings. Most lay-in systems are designed so the panels rest on the grid members without requiring complex fastening. The panels should sit evenly and align cleanly with the grid pattern.
When installing tiles, it is important to ensure that:
The appearance of the finished ceiling depends heavily on this stage. Straight tile lines and a uniform pattern create a polished result.
The final step in the ceiling grid construction process is inspection. The installer should verify that the grid is level, all members are secure, tiles are properly seated, and any supporting wires or accessories are correctly installed. Any visible defects should be corrected before handover.
Final cleanup may include removing debris, dust, packaging, and unused materials. A clean ceiling area not only looks better but also makes it easier to identify any remaining issues before the project is completed.
One reason ceiling grid systems are widely used is that they offer multiple practical benefits in commercial and institutional buildings. Below is a summary of the most common advantages.
| Advantage | Description |
|---|---|
| Easy access to services | Tiles can be removed to reach wiring, plumbing, or HVAC systems above the ceiling |
| Fast installation | Modular components allow efficient assembly compared with more complex ceiling systems |
| Improved acoustics | Compatible panels can reduce noise and improve indoor comfort |
| Flexible design | Grid layouts can adapt to different room sizes and service requirements |
| Professional appearance | A level grid creates a neat and uniform ceiling finish |
| Maintenance-friendly | Damaged tiles can often be replaced individually without affecting the full system |
Ceiling grid systems are available in different sizes and performance levels. The exact specifications depend on the project and regional standards, but the table below shows common general examples.
| Specification | Common Range / Example | Notes |
|---|---|---|
| Grid module size | 600 x 600 mm, 600 x 1200 mm, 2 x 2 ft, 2 x 4 ft | Depends on ceiling tile size |
| Main runner material | Galvanized steel | Chosen for strength and corrosion resistance |
| Finish | White, black, or metallic-coated | Varies by design preference and visibility |
| Suspension method | Wire hangers, anchors, direct supports | Must suit the building structure |
| Load capacity | Light-duty to heavy-duty systems | Depends on manufacturer and design intent |
| Installation depth | Varies by service clearance needs | Must allow space for ducts, cables, and fixtures |
Most Modern Ceiling Grid Systems are manufactured from metal because it provides durability, stability, and long-term performance. Common material choices include:
Material selection should consider environmental conditions, required fire performance, humidity levels, and the intended use of the building.
To achieve a reliable and attractive ceiling grid, installers should follow best practices throughout the process. These practices help reduce errors and improve long-term performance.
Although the ceiling grid construction process is straightforward in concept, challenges can arise on site. Common issues include uneven structural surfaces, conflicting service routes, last-minute design changes, and limited plenum space above the ceiling.
Other challenges may include:
Most of these issues can be minimized through careful planning, clear communication, and attention to detail during installation.
A ceiling grid system is often compared with drywall ceilings, stretch ceilings, and other overhead finishes. Each system has different strengths, but the suspended grid remains popular because it is modular, cost-effective, and maintenance-friendly.
| Ceiling System | Main Benefit | Typical Use |
|---|---|---|
| Suspended ceiling grid | Easy access and modular installation | Offices, schools, retail, healthcare |
| Drywall ceiling | Continuous surface with minimal visible joints | Residential and decorative interiors |
| Stretch ceiling | Smooth modern appearance with design flexibility | High-end interiors and specialty spaces |
| Open ceiling | Exposed structural and service elements | Industrial and modern commercial designs |
Ceiling grid systems are used in many different building types because they provide a practical combination of appearance and performance. Common applications include:
Each application may require specific acoustic, fire, or load-bearing considerations. For example, healthcare and educational spaces often prioritize easy maintenance and sound control, while retail environments may focus more on visual design and lighting integration.
To better understand ceiling grid construction, it helps to know a few commonly used terms:
| Term | Meaning |
|---|---|
| Plenum | The space above the suspended ceiling and below the structural deck |
| Grid module | The repeating tile opening size formed by the main runners and cross tees |
| Suspension wire | Wire used to hang the ceiling grid from the structure above |
| Perimeter trim | The edge member installed along the wall line |
| Lay-in tile | A removable ceiling panel that rests in the grid |
| Cross tee | A member that connects main runners and forms the grid pattern |
The ceiling grid construction process explained step by step shows how a suspended ceiling framework is planned, installed, leveled, and finished. From reviewing drawings and marking the perimeter to installing main runners, cross tees, and ceiling tiles, every stage contributes to the final performance and appearance of the ceiling.
A well-built ceiling grid system provides clear advantages: easy access to building services, modular flexibility, efficient installation, and a professional finish. Whether used in offices, schools, healthcare facilities, or retail environments, the ceiling grid remains one of the most practical solutions in modern interior construction.
For project pages, blog posts, and industry content, this topic offers strong SEO potential because it includes high-intent phrases such as ceiling grid construction process, suspended ceiling grid, ceiling grid system, and ceiling grid installation. With clear structure, useful tables, and definition-based content, it is well suited for Google indexing and long-form informational pages.
This website uses cookies to ensure you get the best experience on our website.


 Phone:
Comment
(0)